Video-First Construction Documentation: Legal Standards, Dispute Scenarios, and AI-Powered Proof
The documentation problem and legal stakes
Construction disputes are expensive and often hinge on one thing: documentation. With 70% of disputes traced to poor recordkeeping and average defense costs climbing into the six figures, contractors can no longer rely on scattered photos stored across crew phones. Photos capture moments; video captures context, sequence, movement, causation, and spatial relationships, and courts increasingly treat well-handled video as a higher-value form of visual proof.
Documentation failures are not just an administrative nuisance, they are the single greatest business risk facing general contractors today. The Arcadis 2025 Global Construction Disputes Report identifies contractual ambiguities and poor documentation as the top cause of disputes worldwide, with North American dispute values surging 40% in 2024 alone. Meanwhile, Gallagher Bassett's 2026 Construction Market Outlook reports that professional liability claims in construction rose 10.6% in 2025, with design and workmanship errors driving 64% of those claims and average defense costs reaching $128,500 per claim. For a small general contractor operating on thin margins, a single poorly documented dispute can threaten the entire business.
The pattern is consistent across the industry: when documentation is incomplete, inconsistent, or inaccessible, disputes escalate faster, last longer, and cost more. What makes this especially dangerous is that most contractors believe they are documenting adequately, because someone on the crew is snapping photos with a phone. But as we'll see, that casual approach introduces risks that compound over the life of a project and become acutely painful when a claim hits.
The Photo-First Habit and Its Hidden Vulnerabilities
The overwhelming majority of field documentation today still starts and ends with photos taken on personal smartphones. While photos are better than nothing, this approach creates systemic weaknesses that are often invisible until a dispute arises. Photos stored in individual phone galleries, scattered across text threads, or dumped into generic cloud folders are nearly impossible to organize into a coherent project narrative after the fact. As industry guides note, generic file names like "IMG_1234" and the absence of standardized tags make retrieval a nightmare, and retrieval is exactly what you need when an attorney sends a discovery request.
Personal devices also create chain-of-custody problems. When a laborer's phone breaks, gets replaced, or the employee leaves the company, those photos may vanish permanently. Even when images survive, their metadata, timestamps, GPS coordinates, device identifiers, is frequently stripped during transfer via messaging apps or email. Research on construction photo management confirms that unsecured personal storage exposes site data to tampering risks and strips the evidentiary value courts require. The result is a documentation archive that looks substantial in volume but crumbles under legal scrutiny.
There are also cognitive blind spots. Photos freeze a single moment from a single angle. They cannot convey motion, sequence, or spatial relationships. A photo of a properly installed flashing tells you nothing about whether it was installed before or after the adjacent membrane, and opposing counsel will exploit every one of those gaps.
Legal Standards for Visual Evidence: What Courts Actually Require
When construction disputes reach litigation or arbitration, visual evidence is only useful if it can be authenticated. Under Federal Rule of Evidence 901, the proponent of any photograph or video must provide "evidence sufficient to support a finding that the item is what the proponent claims it is". In practical terms, courts look for four elements: reliable timestamps proving when the image was captured, geolocation data confirming where it was taken, a clear chain of custody showing who handled the file, and proof that the file has not been altered or tampered with.
The "silent witness" doctrine raises the bar further, and also presents a powerful opportunity for contractors who use video. Under this doctrine, courts allow video evidence to be admitted without eyewitness testimony, provided the proponent can demonstrate that the recording system was reliable and that the footage has not been modified since creation. A video with intact metadata from a verified recording system essentially speaks for itself, making it far more difficult for opposing parties to challenge. Photos, by contrast, are more easily attacked: they lack continuity, their metadata is more commonly stripped, and each image requires independent authentication context.
For small contractors, the stakes of failing authentication are severe. Evidence ruled inadmissible can turn a winning position into a total loss, and the cost of trying to reconstruct a documentary record after the fact dwarfs the cost of capturing it properly in the first place.
eDiscovery: Where Photo-Based Records Become a Liability
Modern construction litigation increasingly involves eDiscovery, the legal process of identifying, collecting, and producing electronically stored information. eDiscovery in construction cases is notoriously difficult because of the sheer volume of data generated across dozens of devices, custodians, and platforms. A mid-size project can generate thousands of photos spread across multiple crew members' personal phones, various messaging apps, email attachments, and project management platforms.
Industry analyses of construction eDiscovery identify three recurring pain points: the volume of scattered image files overwhelms standard review workflows, the heterogeneity of source devices complicates forensically sound collection, and metadata loss during file transfers undercuts the evidentiary value of what is collected. For a large firm with in-house counsel, these are expensive headaches. For a small general contractor, they can be crippling, triggering five- and six-figure legal costs just to organize and produce responsive documents, long before anyone debates the merits of the underlying claim.
The reputational dimension is equally real. A contractor who cannot produce organized, authenticated records during discovery signals to insurers, sureties, and future clients that their operations are loosely managed. Conversely, a contractor who produces clean, time-stamped, geo-tagged video records with an intact chain of custody projects competence and credibility, often prompting earlier and more favorable settlements.
Why video captures what photos miss
A photograph freezes a single instant from a single angle. That is its strength and its limitation. A video, by contrast, records continuity and sequence—the unbroken visual relationship between one condition and the next. When a camera pans from a roof penetration down a wall to a puddle on the floor, the viewer sees the spatial connection between cause and effect in real time. A photo of the penetration and a separate photo of the puddle leave the viewer to guess whether those two conditions are even related. Courts and arbitrators are "far more likely to trust what they can see with their own eyes," and video's dynamic storytelling capacity gives it immense persuasive influence by engaging legal audiences through dynamic visual storytelling.
Photo blind spots are predictable and well-documented. Construction Executive notes that photographs lacking scale references, surrounding context, or timestamps "weaken proof of when defects occurred or progressed." Three recurring problems undermine photo-only documentation:
- No scale. A crack in a foundation wall may appear hairline or structural depending on lens distance. Without a ruler, level, or other reference object in the frame, the image is ambiguous. In video, you can zoom from a wide establishing shot to a close-up with a measuring tape held against the defect—all in one unbroken clip that removes doubt about size.
- Angle bias. A single photograph of a bowed wall, taken head-on, can make the deflection invisible. Multiple photos from different positions help, but a slow lateral pan on video reveals the curvature naturally, the way a person's eye would see it in the field.
- Missing timeframe. Ten photos taken over a week look identical unless someone reads embedded metadata—and metadata is routinely stripped when images move through text messages or email. Video with spoken narration ("This is Unit 4B, Tuesday March 18, seven a.m., before drywall close-up") anchors the footage to a specific moment on the project schedule in a way that is self-authenticating on playback.
Video also delivers something photos structurally cannot: proof of causation and progression. Showing that water traveled from Point A to Point B, that a crack widened between two dates, or that a subcontractor's crew worked out of sequence requires a medium that records motion and time. Construction video documentation captures dynamic processes such as site walkthroughs and work sequences, providing evidence of cause-and-effect relationships that static images simply cannot convey.
From a legal standpoint, continuous video with intact metadata meets evidentiary standards more robustly than a batch of disconnected images. Metadata fields—timestamps, GPS coordinates, device identifiers—are embedded in every frame of a video file. Forensic analysts can cross-verify those fields against real-world conditions such as sun position and shadow angles using tools like SunCalc, making tampering extremely difficult to conceal. When a continuous recording shows an unbroken chain from start to finish, it satisfies the authentication demands courts impose under the silent witness doctrine far more convincingly than a folder of JPEGs with gaps between them.
When to Use Photos vs. Video
| Use Case | Photo Advantage | Video Advantage |
|---|---|---|
| Material stamps & labels | Preferred. High-res close-up captures fine print, model numbers, UL ratings clearly. | Supplemental. Video can show label in context of installed location. |
| Detailed close-ups of finishes | Preferred. Macro photography reveals texture, color match, and surface defects at pixel level. | Supplemental. Useful for showing defect extent across a surface. |
| Full-room or building walkthroughs | Limited. Multiple stills miss transitions and spatial flow. | Decisive. Continuous footage shows room-to-room relationships and overall condition. |
| Leak sourcing & water intrusion paths | Limited. Cannot show direction of flow or connect entry point to damage. | Decisive. Pan from source to destination proves causation in a single clip. |
| Sequence verification (work order) | Limited. Timestamps alone don't show task order within a day. | Decisive. Narrated video with time codes proves what was installed before what. |
| Pre-existing conditions (neighboring property) | Limited. Selective framing invites challenges of cherry-picking. | Decisive. Unbroken sweep documents entire condition without selection bias. |
| Safety compliance snapshots | Useful for PPE spot-checks and signage. | Stronger. Shows crew behavior over time, not just a posed moment. |
None of this means you should stop taking photographs. A hybrid approach is the practical answer. Use high-resolution photos for material labels, product stamps, fine-finish close-ups, and any situation where pixel-level detail matters more than spatial context. Best practice guidance from construction litigation experts recommends pairing "daily reports with dated photographs" alongside "video walkthroughs" to create complementary layers of evidence. The photo becomes a supporting exhibit; the video becomes the narrative backbone.
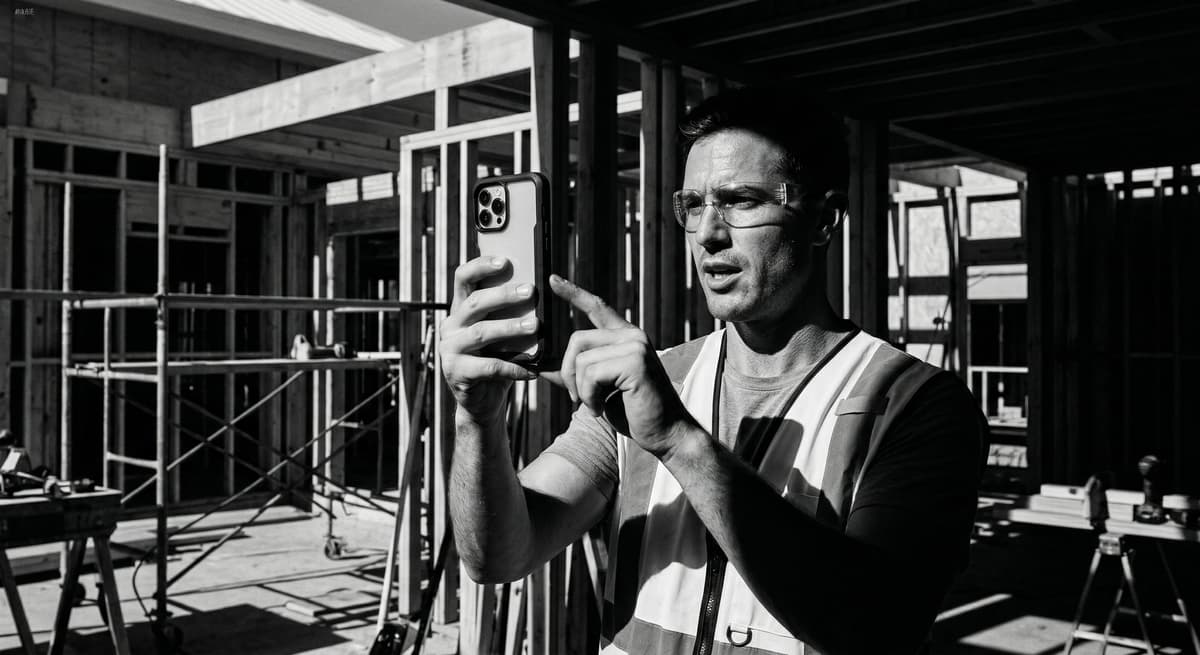
The critical shift, however, is in default behavior. When your crew arrives at a site, the first instinct should be to press record, not snap a picture. A two-minute narrated video walkthrough every morning—covering the areas you will touch that day—creates a time-stamped, geolocated, continuous record that is orders of magnitude harder to challenge than a handful of photos taken at random intervals. That single habit change is the foundation of a video-first evidence strategy.
Five scenarios that prove video wins
Understanding where photos fall short is one thing. Seeing it play out in real disputes is another. The following five scenarios are drawn from the most common categories of construction claims and illustrate exactly how a properly captured video walkthrough produces evidence that a stack of photographs simply cannot match.
Scenario 1: Water Damage, Tracing Direction of Flow
The dispute: A homeowner claims your crew's rough plumbing caused water damage to a finished ceiling below. You believe the leak originated from a pre-existing roof flashing failure two stories up. The insurance adjuster has photos showing staining on drywall, and both sides are pointing fingers.
What photos typically show: A series of static images of water stains on the ceiling and wall. The problem is that a photograph of a brown stain gives zero information about where the water came from or which direction it traveled. Photos flatten spatial relationships—you cannot tell whether a stain runs from the ceiling down the wall or wicked upward from a floor-level source. There is no continuity, no sequence, and no motion to follow.
What a video walkthrough shows: Begin on the roof. Narrate the date, time, project address, and weather conditions. Slowly pan across the flashing at the penetration in question, holding a tape measure against any visible gap. Move inside, tracing the path water would follow—across the attic sheathing, down the wall cavity, to the ceiling below. Keep the camera moving in one continuous shot so the viewer sees the spatial connection between the exterior breach and the interior damage. Include a moisture meter in frame, pressing it against the drywall at multiple points and reading the values aloud. Forensic water intrusion investigators following ASTM E2128 protocols use exactly this approach—recording controlled spray tests on video while simultaneously filming the interior to correlate exterior entry points with interior water appearance. If you have a thermal camera, sweep the affected area and narrate the temperature differentials.
The evidentiary difference: In court or arbitration, a continuous video showing the unbroken path from a roof deficiency to the ceiling stain—with GPS metadata confirming the location and timestamps anchoring it to the project schedule—establishes causation in a way that individual photographs never can. A judge watching footage of a moisture meter spiking at progressive points along a wall cavity is seeing a narrative of cause and effect. Photographs of the same stain are merely exhibits of damage with no story.
Scenario 2: Electrical Panel Wiring, Proving Proper Installation Before Cover-Up
The dispute: During a final inspection, an electrical inspector flags wiring concerns at a subpanel. The homeowner's attorney later claims your electrician used improper wire gauges and failed to follow the NEC bonding requirements. By the time the claim surfaces, the drywall is closed and the wiring is concealed.
What photos typically show: Close-up images of wire connections, breakers, and panel labels are excellent for documenting static defects like double-tapped breakers or corrosion. But photos of a panel box taken before drywall closure show individual details without context. You might capture three or four angles of the panel, but miss the wire routing behind it. You cannot show in a photo that every wire run from the panel to each outlet was properly sized and supported, because photos are isolated moments with no spatial continuity.
What a video walkthrough shows: Start at the panel with a wide shot showing the full installation, then narrate: "This is the subpanel at [address], rough-in complete, [date]. All circuits are labeled on the panel schedule." Slowly pan inside the panel, tracing each wire from the breaker to the point where it exits the box, reading the wire gauge printed on the sheathing aloud. Then follow the wire runs along the studs and joists, keeping the camera moving in one fluid path so the viewer can see the gauge, support stapling, and routing of each circuit to its destination. Show the grounding and bonding connections with a close-up, then pull back to show the full panel relationship to the grounding electrode.
The evidentiary difference: When an opposing attorney claims improper wiring, your video lets a judge or arbitrator see—without destructive testing—exactly how the work was installed before concealment. The continuous footage eliminates the accusation that photos were selectively taken to hide deficiencies. Metadata timestamps confirm the video was captured before drywall closure, anchoring it to the construction schedule.
Scenario 3: HVAC Airflow and Balancing, Documenting a System That Moves
The dispute: Six months after occupancy, a commercial tenant complains that certain zones are consistently too warm. They hire an HVAC consultant who claims the system was never properly balanced. Your crew performed testing, adjusting, and balancing (TAB) at commissioning, but now the tenant wants you to foot the bill for a complete re-balance and duct modifications.
What photos typically show: Perhaps an image of a flow hood held up to a diffuser with a CFM reading displayed, or a snapshot of the balancing report on a clipboard. These are useful for confirming that a measurement was taken at a moment in time, but they cannot demonstrate the process—whether the tech checked every register, adjusted dampers, or verified return air.
What a video walkthrough shows: Walk the entire system. Start at the air handler, show the fan speed setting, filter condition, and static pressure readings on the gauges. Narrate: "System is running at design conditions, [date and time], [project address]." Move to the first supply diffuser, hold the flow hood in frame, and read the CFM measurement aloud, comparing it to the design specification on your airflow schedule—which you hold up next to the reading. Repeat at every register, including return air grilles. At each damper, show its position. If a VFD is present, show its setting on the controller display.
The evidentiary difference: A TAB report on paper can be challenged as fabricated. A video showing your technician physically measuring every register—with timestamps matching the dates on the report—is far harder to discredit. An arbitrator reviewing the footage sees a complete, systematic process, not cherry-picked data points.
Scenario 4: Cabinet Alignment and Function, Proving the Work Was Plumb, Level, and Operational
The dispute: A homeowner refuses to pay the final draw on a kitchen remodel, claiming the cabinets are crooked, the doors do not align, and the countertop has visible gaps. You know the installation met specifications, but the home's original walls and floors were significantly out of plumb and level—a condition you accommodated with shimming and scribing.
What photos typically show: A few shots of the finished kitchen looking straight-on. These images appear to confirm the homeowner's claim because a camera held at a slight angle can make perfectly level cabinets look off. Conversely, a photo taken dead-on can make uneven cabinets look straight. Photos have inherent angle bias, and without a reference device in frame, there is no way to prove level or plumb from a photograph alone.
What a video walkthrough shows: Begin with a wide shot of the full kitchen, then move to the base cabinets. Place a 4-foot level on the countertop and let the camera hold on the bubble for a full three seconds—long enough that no one can claim the frame was paused at a convenient moment. Narrate: "Four-foot level on the countertop surface, [date], showing level within tolerance." Repeat on the wall cabinet faces. Open and close every door and drawer on camera, slowly, showing that each operates smoothly and closes flush. Use a combination square at the cabinet joints to show gap dimensions, reading the measurement aloud. Then—and this is where video wins decisively—pan down to the floor and place the level there, showing the original floor condition. Narrate: "The original subfloor is out of level by [measurement]. Cabinets were shimmed to compensate." Walk to the wall and repeat, showing plumb deviation.
The evidentiary difference: A video showing level cabinets on an unlevel floor directly disproves the "breach" element. The footage of every door opening and closing smoothly eliminates the "damages" claim on functionality. A judge can watch the entire kitchen in three minutes, seeing the level readings, hearing the narration, and verifying the GPS metadata matches the project address.
Scenario 5: Pre-Existing Site Conditions, Protecting Yourself Before the First Shovel
The dispute: You are hired for an addition on a 1960s ranch home. Midway through the project, the homeowner notices cracks in the existing foundation and claims your excavation caused structural damage. The cracks were there before you started, but you never documented them.
What photos typically show: If you thought to take them, maybe a handful of images of the foundation from the exterior. But photos of a foundation wall taken before work begins are rarely comprehensive. You capture the obvious side of the house near the addition and miss the opposite wall. You photograph a crack, but without a scale reference, the width is unknown.
What a video walkthrough shows: Before any work begins—ideally on the day you mobilize equipment—walk the entire existing structure. Start outside. Narrate the date, time, address, and project scope. Move slowly along every foundation wall, pausing at every crack. Hold a crack gauge or ruler against each one and read the width aloud: "Existing crack at southwest corner foundation, measuring approximately 1/8 inch." Walk inside and document every room adjacent to the work area—floors, walls, ceilings, existing finishes. Open and close doors to show whether they stick (indicating prior settlement). Show the condition of the driveway, sidewalks, and neighboring structures. Capture the condition of utilities, drainage, and vegetation.
The evidentiary difference: Differing site conditions (DSC) claims are among the most common and expensive disputes in construction. To prevail, a claimant must prove a physical, material difference between the conditions indicated in the contract documents and the conditions actually encountered. Your pre-work video flips that burden. If the homeowner alleges your work cracked the foundation, you produce timestamped, GPS-tagged footage showing the crack existed before mobilization, measured at a specific width. The metadata anchors the footage to a date before construction activity. In arbitration, this is often dispositive—the claim ends when the video is played.
Field Crew Video Checklist
Give every crew member this list so these five scenarios are captured consistently on every project:
- Always narrate at the start: State the date, time, project address, your name, and the purpose of the video ("pre-work baseline," "rough-in walkthrough," "completion walkthrough").
- Keep the camera moving in continuous shots: Do not stop and restart recording. Continuous footage establishes spatial relationships and prevents claims of selective editing.
- Include a measuring device in frame: Use a tape measure, 4-foot level, crack gauge, moisture meter, or flow hood—whatever the scenario calls for. Read measurements aloud.
- Show adjacent spaces: Do not just film the work area. Pan to surrounding rooms, floors, ceilings, and the exterior to provide full context.
- Capture before concealment: Rough-in plumbing, electrical, HVAC duct connections, waterproofing membranes, and any work that will be covered by drywall, concrete, or finishes must be recorded before cover-up.
- Demonstrate function on camera: Open doors and drawers, run water through drains, turn on HVAC systems, flip breakers. If it moves, record it moving.
- Pan slowly: Move the camera at walking speed or slower. Quick, jerky pans produce unusable footage and appear rushed in a courtroom setting.
- Let timestamps and GPS run automatically: Confirm your device's date, time, and location services are enabled before every recording. Do not manually edit metadata after capture.
- Anchor to the project schedule: Reference the milestone verbally: "This is the pre-drywall walkthrough for Phase 2" or "This is the day-one baseline before excavation begins."
- Upload immediately to centralized storage: Do not leave footage on a personal phone. Transfer to your project's cloud storage the same day so the access log shows a clean chain of custody.
How to build a video-first documentation system that holds up
Having established the five scenarios where video outperforms photos, the natural next question is how to make this work on a real jobsite with a small crew and a tight budget. The good news: building a video-first documentation system does not require a film crew or a six-figure technology spend. It requires discipline, the right gear, and a workflow designed to hold up under legal scrutiny from day one.
Step 1: Establish Your Four-Phase Capture Calendar
Every project should include four mandatory video events: a pre-work baseline walkthrough documenting existing conditions before you touch anything, milestone videos at every cover-up phase (rough-in mechanical/electrical/plumbing, waterproofing, and pre-drywall), a completion walkthrough, and a client sign-off recording. Pre-drywall walkthroughs are especially critical because everything visible at that stage—plumbing runs, electrical routing, blocking, flashing—will be permanently hidden once drywall goes up. Miss this window, and the only way to verify what was installed is destructive testing.
Step 2: Do the Crew-Time Math
A common objection is that video documentation takes too long. In practice, a single three-minute walkthrough of a room captures the equivalent of 30 to 40 individual photos—and does it with spatial context, narration, and continuous timestamps that photos cannot match. Industry data shows that video-based reality capture workflows are two to five times faster than traditional photo documentation methods, reducing total documentation time by 40–60%. For a five-person crew, that translates to roughly 10 minutes of video per day replacing 30–45 minutes of photo capture and manual tagging.
Step 3: Know When Photos Still Matter
Video does not replace photos entirely. Close-up stills remain essential for documenting serial numbers on equipment, label data on electrical panels, crack measurements with a ruler in frame, and material lot stamps. The rule of thumb: use video to show relationships and sequence, use photos to freeze a single data point at high resolution.
Step 4: Lock Down Metadata Hygiene
Every video your crew captures carries embedded metadata—timestamps, GPS coordinates, device identifiers—that makes it powerful evidence. But that metadata is only useful if it is trustworthy. Courts require proof that digital evidence is authentic and unaltered, and metadata alone is insufficient because timestamps can be manipulated by changing a device clock. To close this gap, implement three practices:
- Enable automatic date, time, and location services on every capture device and prohibit manual override of device clocks.
- Use SHA-256 cryptographic file hashing at the point of upload—a hash generates a unique digital fingerprint for each file, and any subsequent alteration changes the hash, providing tamper-proof integrity verification.
- Pair hashes with a written declaration from the person who captured the footage. This combination of automated metadata, hashing, and human attestation is what forensic experts recommend for robust court admissibility.
Step 5: Build a Chain of Custody That Holds
For video evidence to survive a legal challenge, you need an unbroken record of who captured it, when, and who has accessed it since. Basic cloud storage—Google Drive, Dropbox—does not provide this natively. Instead, adopt these practices:
- Single-account capture policy: Assign one company-owned device per crew or per project. All video is captured under a single authenticated account, eliminating ambiguity about who recorded what.
- Centralized cloud storage with access logs: Upload all footage to a platform that automatically logs every access, view, download, and permission change with timestamps and user IDs. Role-based permissions ensure only authorized personnel can view or export files.
- Immutable storage: Use write-once-read-many (WORM) policies or legal holds to